LS1 project
Photo Page/1 Picture
Contact Me

Welcome graphic


proj14.jpg

adptr_oneng.jpg

this is a test

proj-6.jpg

A pic of the frame mod and motor mounts. I needed the channel iron for the front motor mount so once I had that welded in the original cross member became redundant. So I cut a section out so I could use the stock oil filter set up. In some of the other pictures you can see how I tied it all together.

ls1incar.jpg

starteroneng.jpg

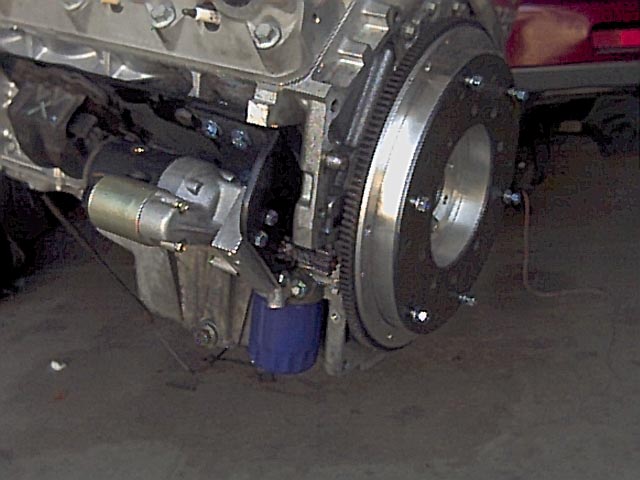
The starter was one of the harder hurdles. I solved the problem by drilling the starter drive gear on the end the same size as a second drive shaft. Then I pressed it in and had it TIG welded. The whole assembly is mounted to the block using existing mounting points.

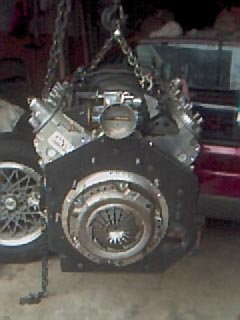
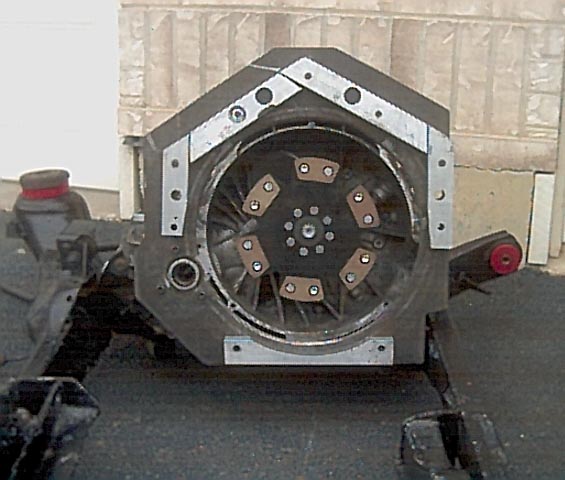
The flywheel was another. I took a fadanza LS1 flywheel (p/n c5-1260 it is a 168 f/w) had a machine shop turn a 1" aluminum doughnut the same size as the removable friction plate. I samwhiched this doughnut in between the f/w and the steel friction surface. It is fastened in place using 20 grade 8 1/8" fasteners and 6 grade five 5/16 bolts which were drilled and tapped to make it one piece.

adptr_engside.jpg

I will be utilizing all of the engine mounting hole and all but one of the trans mounting hole. The one I wont be using is the one just above the C/V joint. I did however use three additional ones that were not use in the original Fiero set up they are the three around the differential. They should help make up for the loss of the one bolt. You may also notice my adapter plate goes all the way around the trans. It is my belief that one solid unit has more strength than individual pieces. It also allows me to include the bottom two mounting bolts of the LS1.

Thanks for dropping by and taking a look at my photos. Please get in touch with any comments or reactions!